Day 44: Deploy Wordpress website on AWS
Hey there! I am Pradeep Chitroliya I am a Devops engineer, started writing articles on my DevOps and cloud journey. My purpose is to share the concepts that I learn, the projects that I build, and the tasks that I perform regarding DevOps. Hope you all find it useful.
Over 30% of all websites on the internet use WordPress as their content management system (CMS). It is most often used to run blogs, but it can also be used to run e-commerce sites, message boards, and many other popular things. This guide will show you how to set up a WordPress blog site.
1.What is wordpree and how to works
WordPress is a popular open-source content management system (CMS) that allows users to create and manage websites easily. It started as a blogging platform but has evolved into a versatile CMS that powers a wide range of websites, from blogs and business sites to e-commerce platforms.
To deploy a website using WordPress, follow these general steps:
Choose a Domain Name and Web Hosting:
Choose a unique and memorable domain name for your website.
Select a web hosting provider that supports WordPress. Some popular hosting providers include Bluehost, SiteGround, and WP Engine.
Install WordPress:
- Many web hosts offer a one-click WordPress installation option through their control panels. Alternatively, you can download WordPress from the official website (wordpress.org) and follow the installation instructions.
Configure Basic Settings:
After installation, log in to the WordPress admin dashboard. You can access it by adding "/wp-admin" to your domain (e.g., www.yourwebsite.com/wp-admin).
Set basic configurations such as site title, tagline, time zone, and other settings in the "Settings" section.
Choose a Theme:
- Select a WordPress theme that suits the design and functionality you want for your website. You can find both free and premium themes on the WordPress Theme Directory or other theme marketplaces.
Install Essential Plugins:
- Extend the functionality of your site by installing plugins. Some essential plugins include those for SEO (e.g., Yoast SEO), security (e.g., Wordfence), and performance optimization (e.g., W3 Total Cache).
Create Content:
- Start adding pages, posts, and other content to your website. Use the WordPress editor to format and organize your content.
Customize Appearance:
- Customize the look and feel of your website using the WordPress Customizer. You can modify colors, fonts, and other design elements.
Set Permalinks:
- Configure your permalink structure under "Settings" > "Permalinks" for SEO-friendly URLs.
Optimize for SEO:
- Use SEO plugins and follow best practices to optimize your website for search engines. This includes adding meta titles, descriptions, and alt text for images.
Configure Backups:
- Set up a reliable backup solution to protect your website data. Many hosting providers offer backup services, and there are also WordPress plugins for this purpose.
Ensure Security:
- Implement security best practices, such as using strong passwords, updating WordPress, themes, and plugins regularly, and using a security plugin.
Launch Your Website:
- Once you are satisfied with your website, it's time to launch it for the public to see. Remove any "Under Construction" pages or settings.
Remember that this is a general overview, and the specific steps might vary depending on your hosting provider and the theme or plugins you choose. Always refer to the documentation provided by WordPress and your hosting service for detailed instructions.
Task-01
- As WordPress requires a MySQL database to store its data ,create an RDS as you To configure this WordPress site.
- login to aws account the search in RDS and create mysql database.
- Search in aws console in rds and selected to mysql data base.
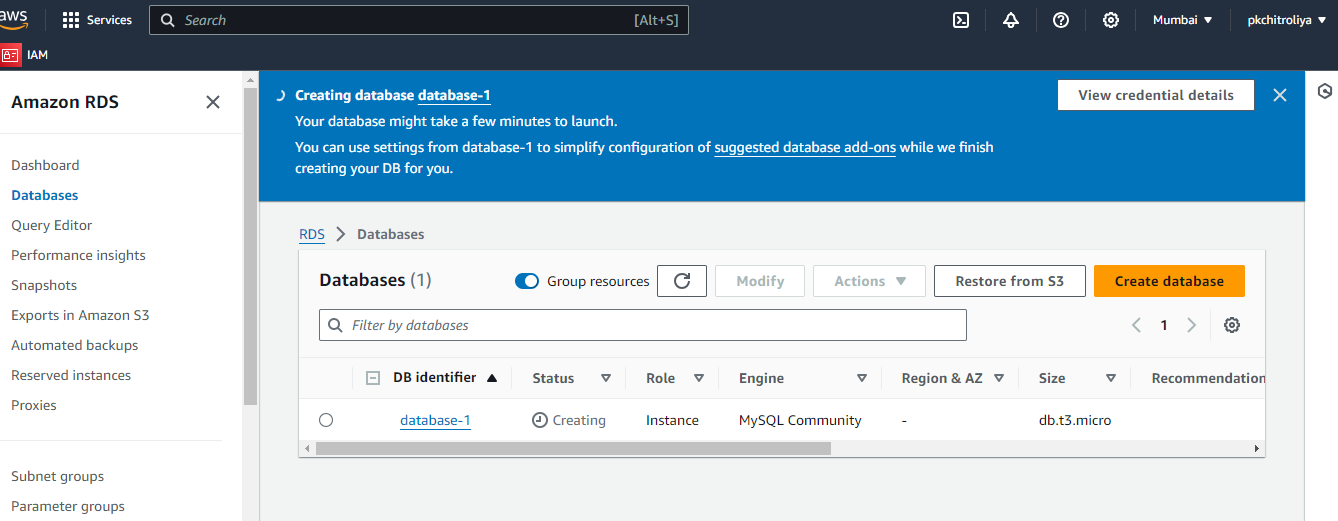
Here we can see that create a mysql RDS database as per project requirement.
- An Amazon EC2 instance to install and host the WordPress application.
Go to the Amazon EC2 console
Click Launch Instance, Choose a Linux AMI
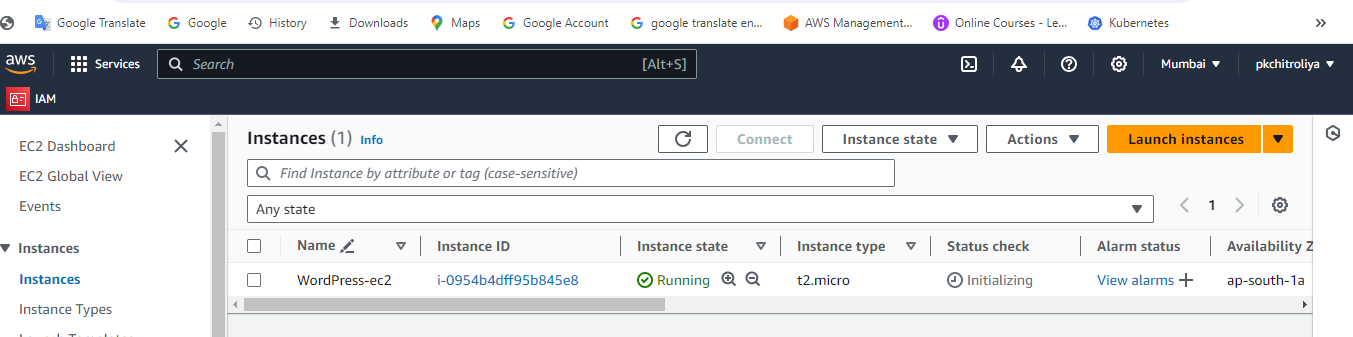
Allow EC2 instance to access our WordPress database
- Go to the Amazon RDS databases page in the AWS console. Choose the MySQL database you created in the earlier
- Select the Inbound Rules tab, then choose the Edit inbound rules button to change the rules for your security group.
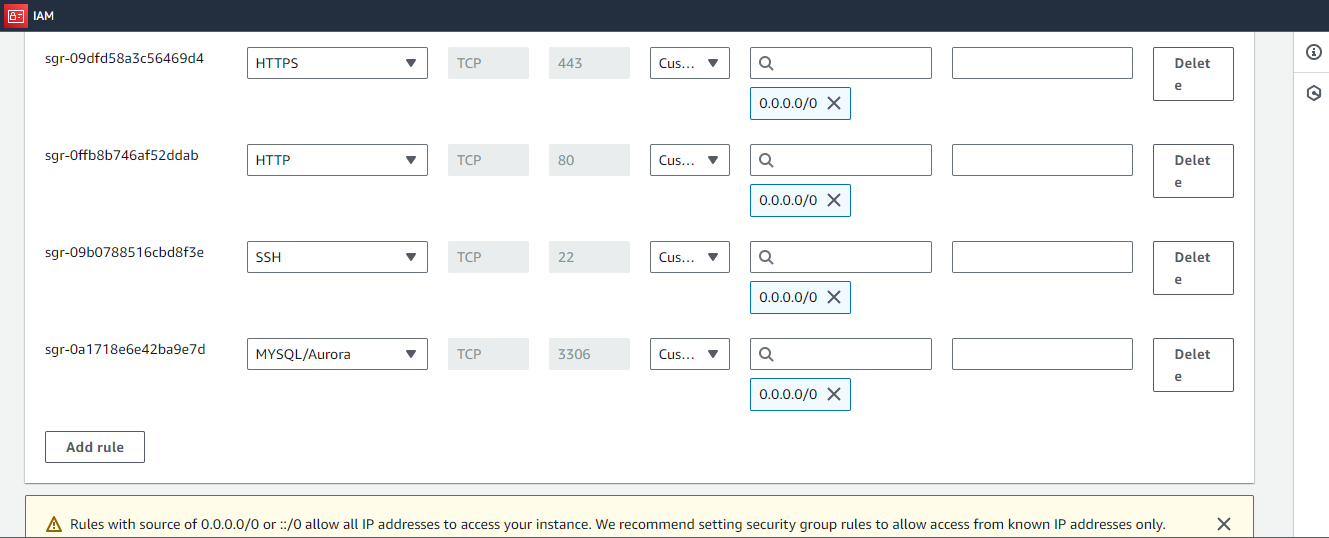
Here we can see the how to create security group in ec2 instance
- An Amazon RDS for MySQL database to store your WordPress data
- Install a MySQL client in your terminal to access the database login EC2 instance nad that install mysql client.
sudo apt install mysql-client -y
mysql  --version

Connect to the RDS instance using the MySQL client and the endpoint address, username, and password
Go to rds database then copy the database and put it the in mysql terminal and used the below mention commmand for RDS database login.
  mysql -h <endpoint address> -P <port.no> -u <username> -p
  mysql -h wordpress.cj0gy0agmk2z.ap-southeast-1.rds.amazonaws.com -P 3306 -u admin -p
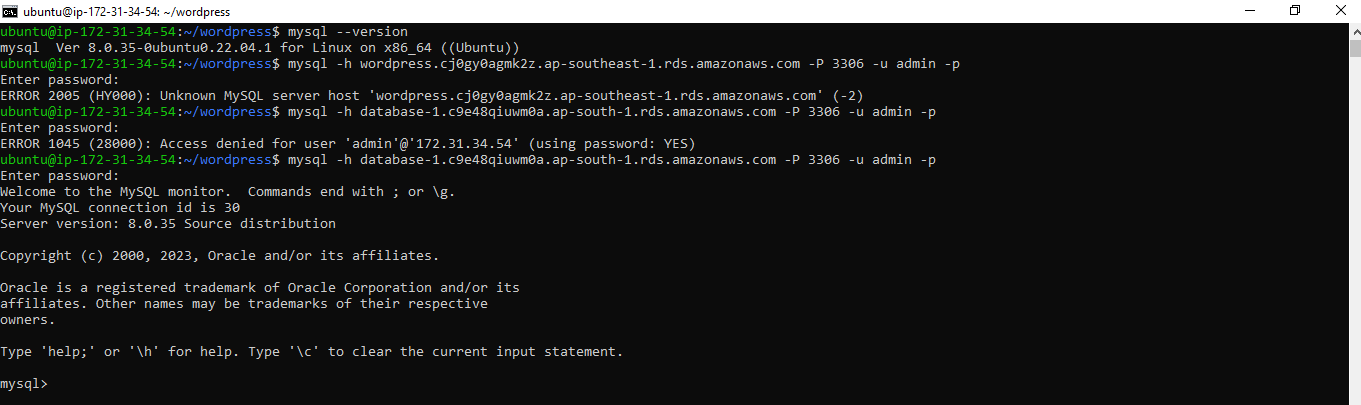
Here we can see the we have sucessful login RDS mysql databases
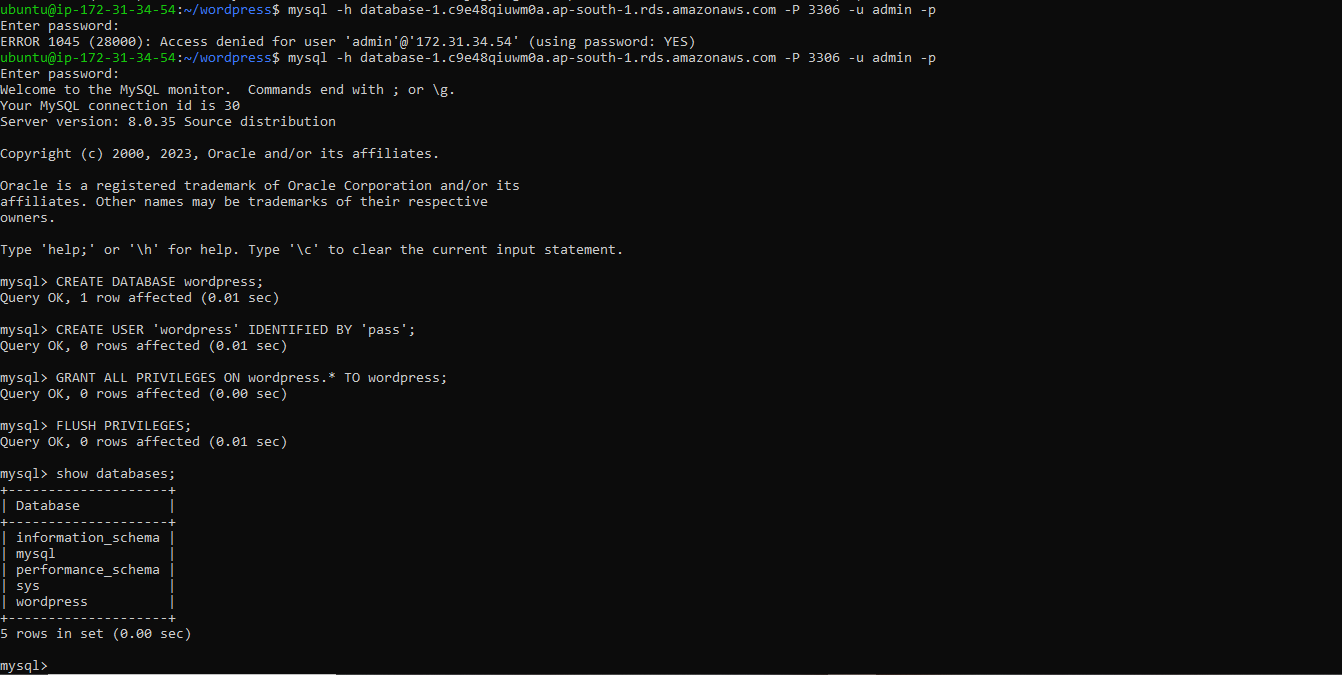
- Create a database user for your WordPress application, and then grant access to the WordPress database to the user.
CREATE DATABASE wordpress;
CREATE USER 'wordpress' IDENTIFIED BY 'pass';
GRANT ALL PRIVILEGES ON wordpress.* TO wordpress;
FLUSH PRIVILEGES;
Exit
- On your EC2 instance install Apache

- To check the Apache service status
Below mention the command using check the apache service status
sudo systemctl restart apache2
sudo systemctl status apache2
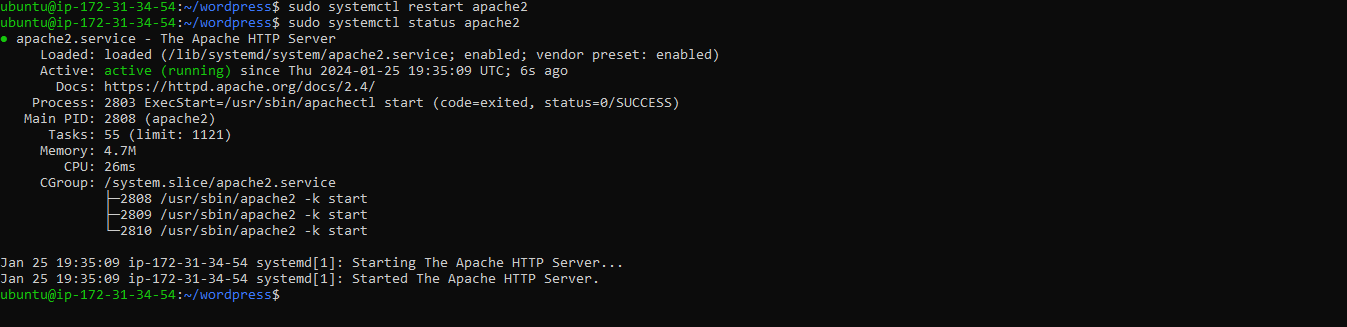
We will be the verfy the appche2 server
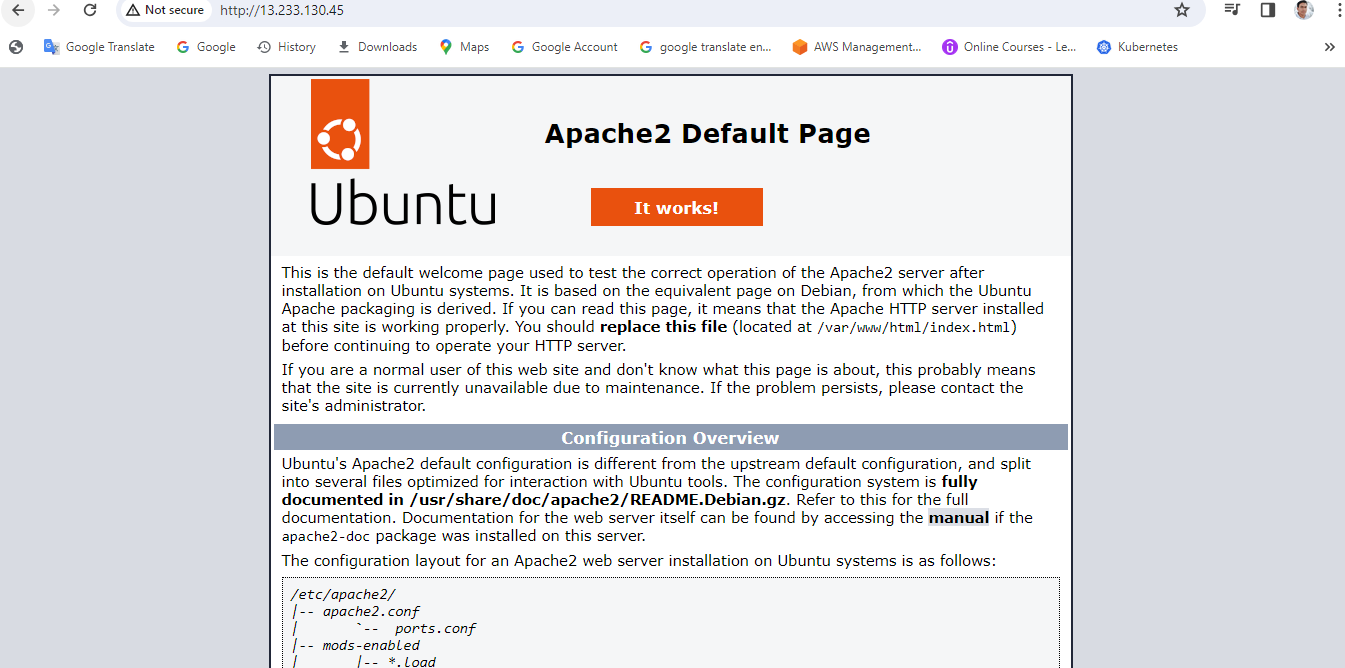
Set up the server and post your new WordPress app
Download the latest version of WordPress and extract the archive
below mention the command using and download the wordpress
wget https://wordpress.org/latest.tar.gz
tar -xzf latest.tar.gz
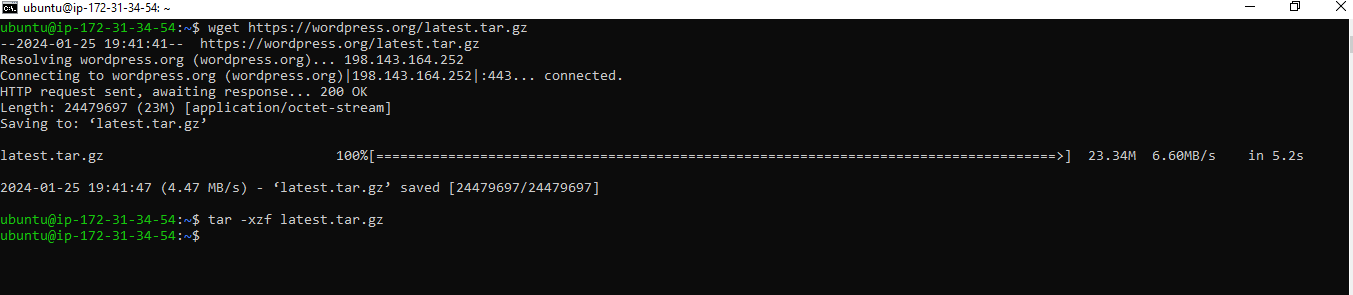
Change the directory to the WordPress directory and create a copy of the default config file
  cd wordpress
  cp wp-config-sample.php wp-config.php
- Then, open the wp-config.php file in vim editor and modify the following lines in the database configuration
DB_NAME: your RDS database name
DB_USER: The name of the user you created in the database in the previous steps
DB_PASSWORD: The password for the user you created in the previous steps
DB_HOST: The hostname of the database means your database endpoint
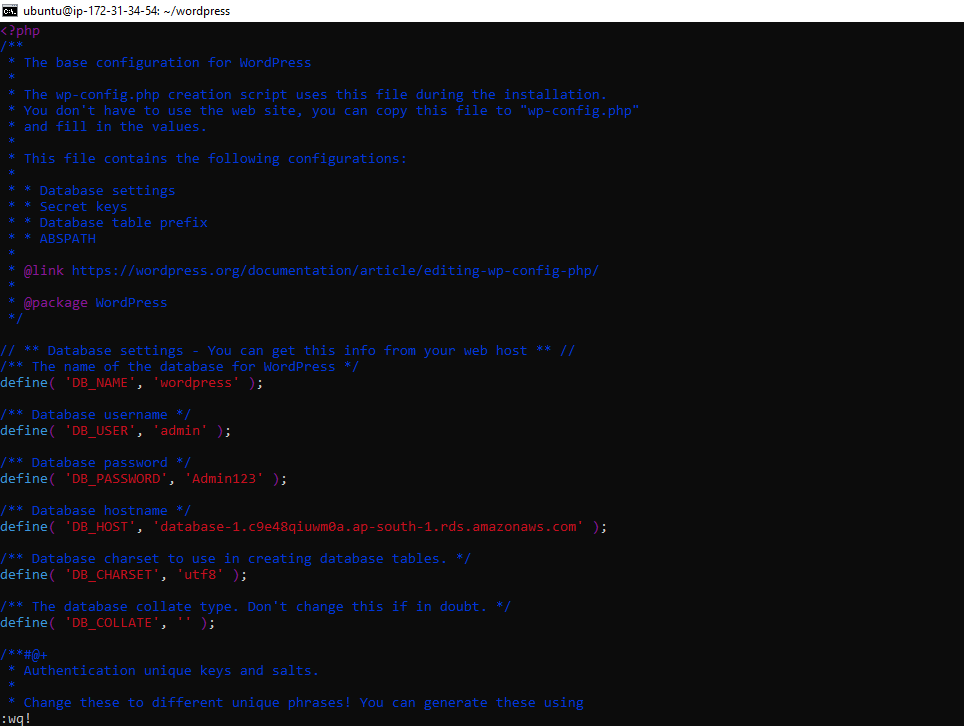
The Authentication Unique Keys and Salts configuration area is the second one that needs to be set up.
You can substitute the following text for everything in that section:
Installing WordPress application dependencies
sudo apt install php libapache2-mod-php php-mysql -y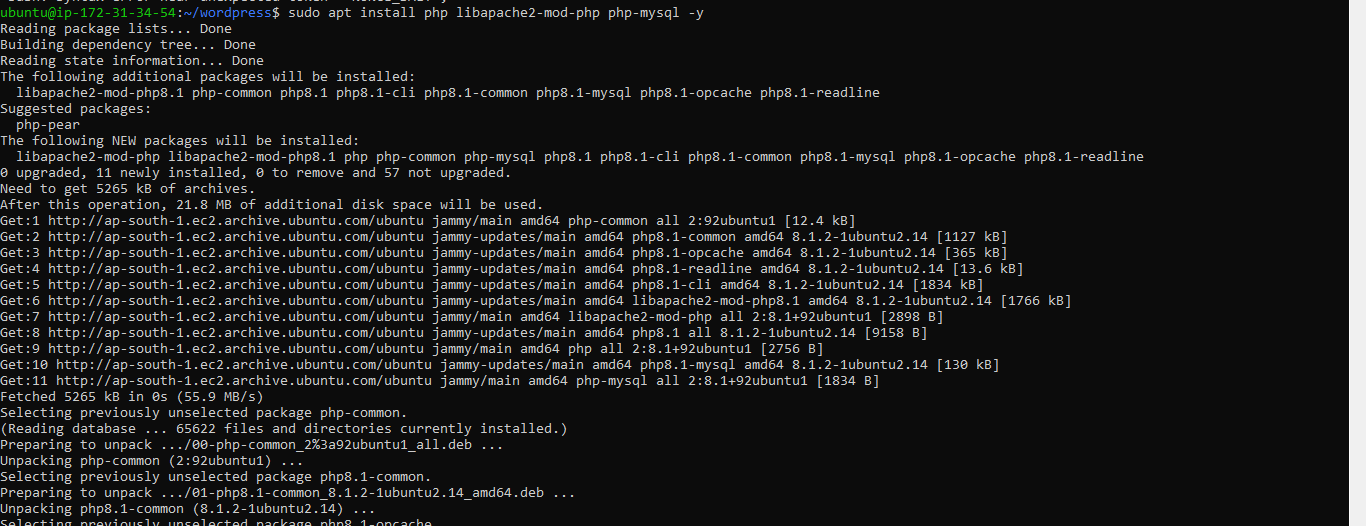
copy your WordPress application files into the /var/www/html directory used by Apache.
sudo cp -r wordpress/* /var/www/html/
here we can see that all data cope to /var/www/html
Restart the Apache web server
  sudo systemctl restart apache2
  sudo systemctl status apache2
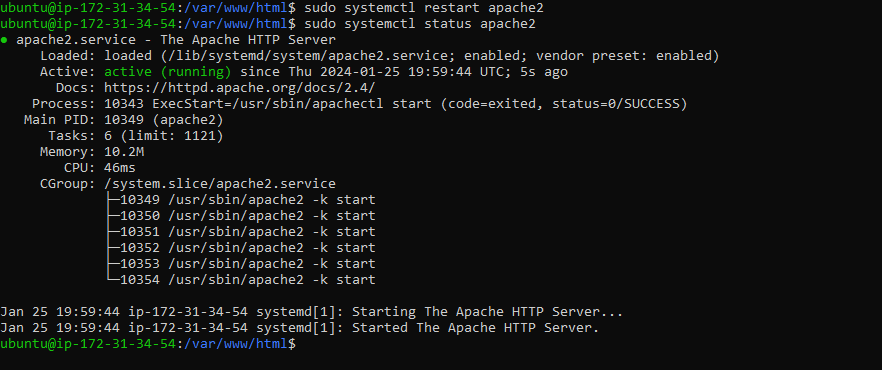
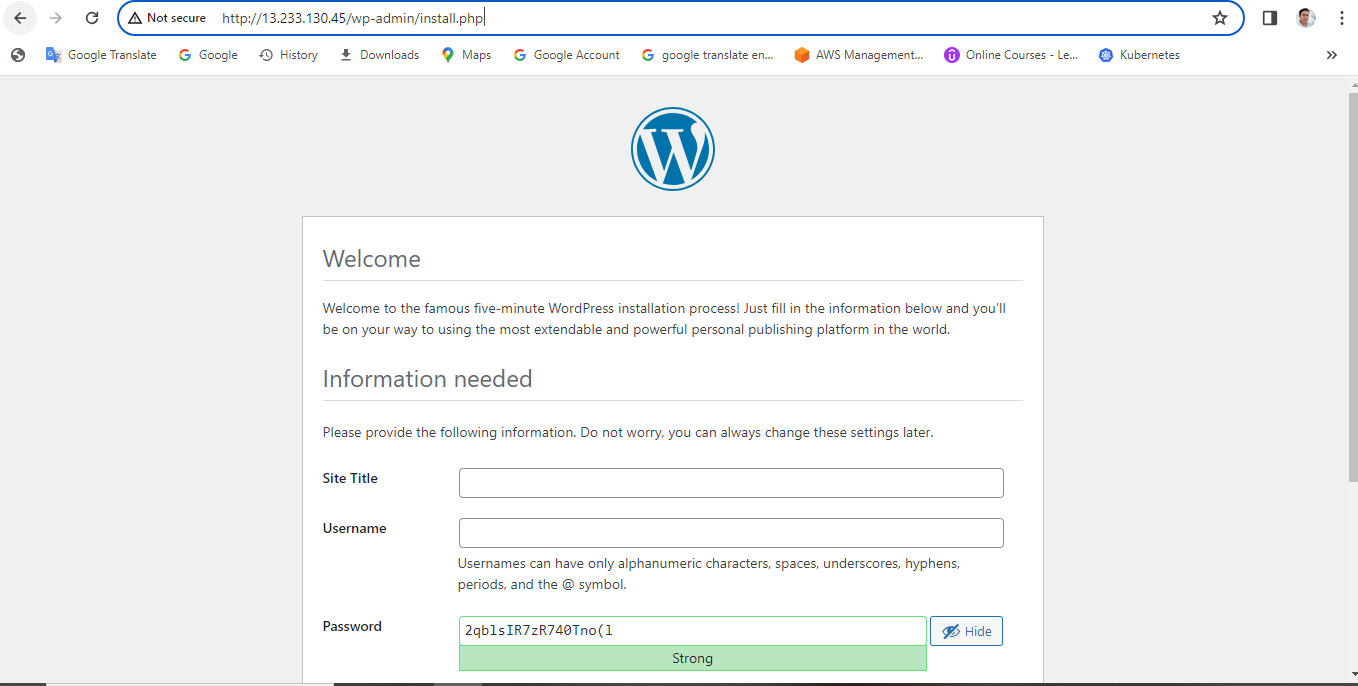
To access the WordPress admin dashboard, open a web browser and enter the following URL;
👋 Conclusion :
In this blog, we successfully deployed a WordPress website on AWS, leveraging services like Amazon EC2 and Amazon RDS., in the next blog we will cover AWS Topics.
Thanks for read my blog if you liked it this blog please like and commend.
Contact me on linkedin
check out my GitHub for more resource GitHub


